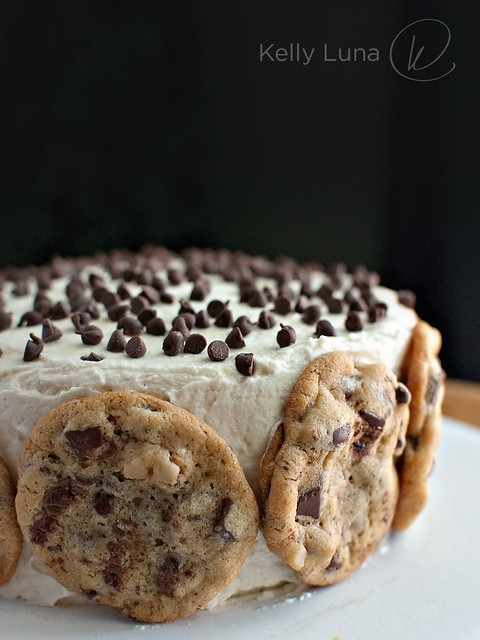
Chocolate Chip Cookie Dough Cake

Right off the bat, I'm going to let you know that I'm not including any recipes directly in this post.
Wait, don't leave!
There will be links to all of the recipes I used, though. This post is more about the
IDEA
of this cake. It takes basic parts — straight up yellow cake, my
favorite buttercream frosting, chocolate chip cookies and a simple
no-bake chocolate chip cookie "dough"— and brings them all together into
something larger than the sum of it's parts.
Another confession — I first made this cake in February. I know. A
thousand apologies, really. I totally meant to write it up way back
then, but I don't even know why I didn't. But a couple of weeks ago, a
co-worker specifically requested this cake for his birthday. As he put
it, "It was the best cake I've ever had." Granted this kid would eat
just about anything you gave him because he's a 24-ish year old guy and
24-ish year old guys will eat just about anything you give them. They're
just grateful for the free meal. But I still took it as a huge
compliment and happily whipped up another cake. Two cakes, actually
(they were small).
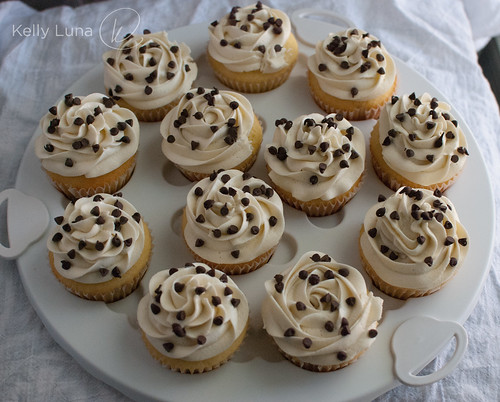
And 12 cupcakes.
Because I'm crazy.
The inspiration for this cake came from two very talented bakers and bloggers who both happened to be named Amanda. Over at
Fake Ginger,
Amanda not only bakes beautiful deserts and breads, she's also a
wonderful cook with a large collection of delicious and easy recipes.
She's a mom of three little boys, so this woman knows the importance of
quick, tasty food!
It was Amanda's
Cookie Dough Cupcakes
that caught my eye. Beautifully photographed and, hello? Cookie dough
cupcakes? Sign me up! Obviously the flavors and the no-bake dough are
where I got the general idea. The cake part, though, came from another
Amanda.
If you follow baking blogs at ALL, you already know Amanda at
i am baker. You do know
i am baker,
right? Do yourself a favor and just scroll through any of her recipe
archives. Your jaw will drop and your stomach will growl. This woman is
an amazingly talented baker with a flair for making the most over the
top incredible cakes that will blow your mind. I'm not kidding.
It was her
Chocolate Covered Cherry Cake that became the inspiration for the assembly of this cake. Go take a look at hers, but promise to come back, OK?

You start with a basic cake.
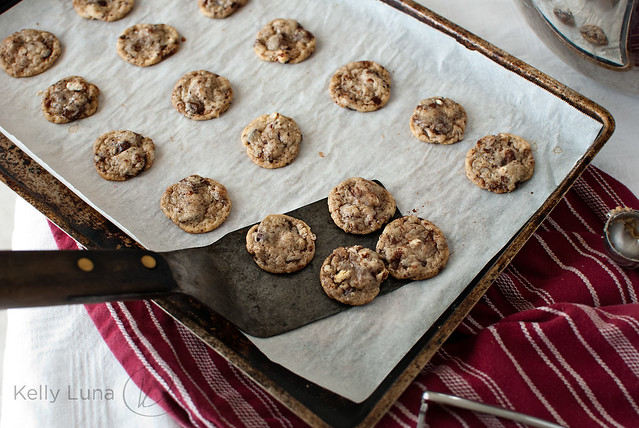
Wait! No, first you want to make cookies. Use your very favorite chocolate chip cookie recipe. My new fave is from
David Lebovitz's Ready for Dessert. You can find the recipe
here, but I highly recommend you check out the entire book. It's scrumptious.
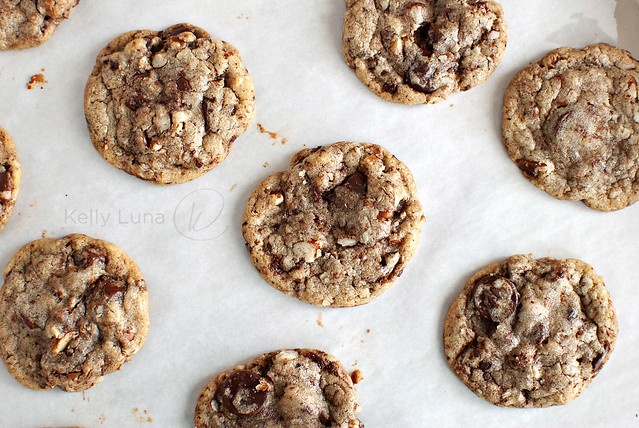
Make small and medium size cookies if you're making a full-size layer cake.
NOW let's make the cake.
After learning how easy it is to make cake from scratch, I almost always use the
1-2-3-4 cake**
you've seen on here a number of times before. There's a reason I keep
using it. I tend to be fickle with a lot of recipes, but not this one. I
haven't looked around for a new one because this never lets me down.
It's always delicious and I always get compliments on it. It's also
sturdier than a box mix, so If you plan on making this cake, I would
honestly suggest you make a scratch cake.
**PLEASE NOTE: This cake will require 2- 9" cake pans. The recipe
link above is for a 9" and a 6" that are cut in half. This cake just
uses 2- 9" cakes that are stacked, not sliced in half. Just level the
tops with knife before assembly. My apologies for any confusion!
 (Unfortunately the frosting is the same color as the cake here, so
it's nearly impossible to see the thick layer of frosting. Bummer. But
this was a semi-failed attempt at a brown sugar frosting, so a white
buttercream will show up better.)
(Unfortunately the frosting is the same color as the cake here, so
it's nearly impossible to see the thick layer of frosting. Bummer. But
this was a semi-failed attempt at a brown sugar frosting, so a white
buttercream will show up better.)
Next you'll need a basic buttercream. You can use my go-to
Best Ever recipe, or your favorite version.
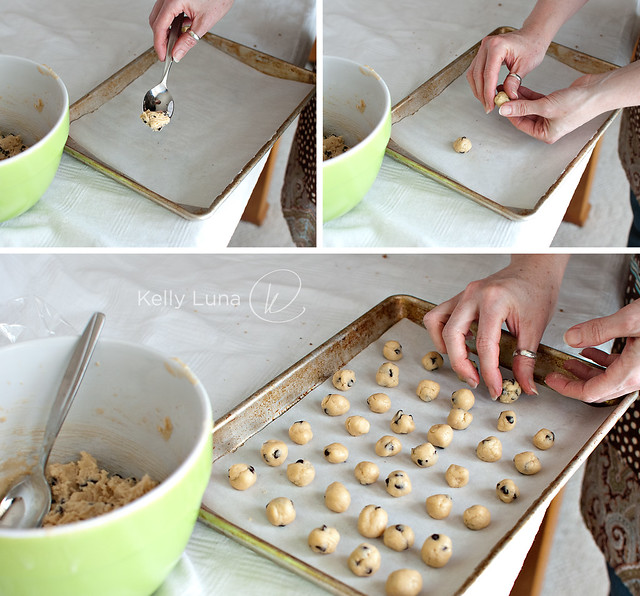
Then you'll need the
cookie "dough".
Mix it right after you put the cakes in the oven so that it has a
chance to set up a bit in the fridge. Makes it easier to form little
balls of dough.
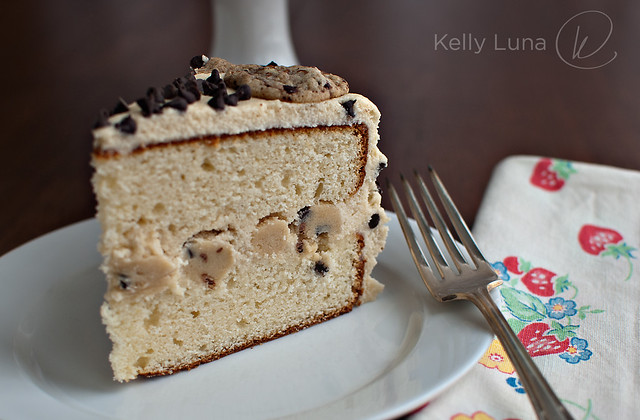
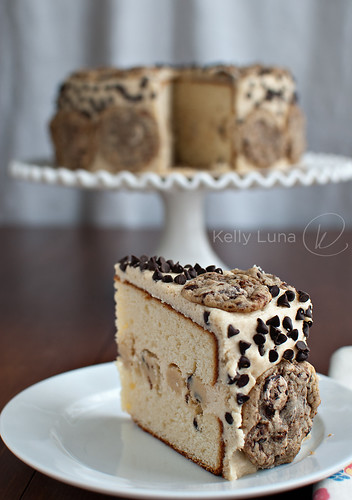
And here's where the magic happens. And where the Chocolate Covered
Cherry cake inspiration comes in to play. I love the idea of a surprise
center in a cake or cupcake and the idea of having the super thick
frosting layer, so Amanda's cake stuck in my head and burst forth when I
had the epiphany for this cake. Slather a thick layer of frosting in
with a bunch of cookie dough balls. Sort of like cookie dough ice cream,
but as the center of a cake.
I took the chilled cookie "dough" and made a bunch of small balls.
Then went to work assembling the cake. I put some frosting in a bowl,
then added some dough balls, slapped it on the bottom layer.
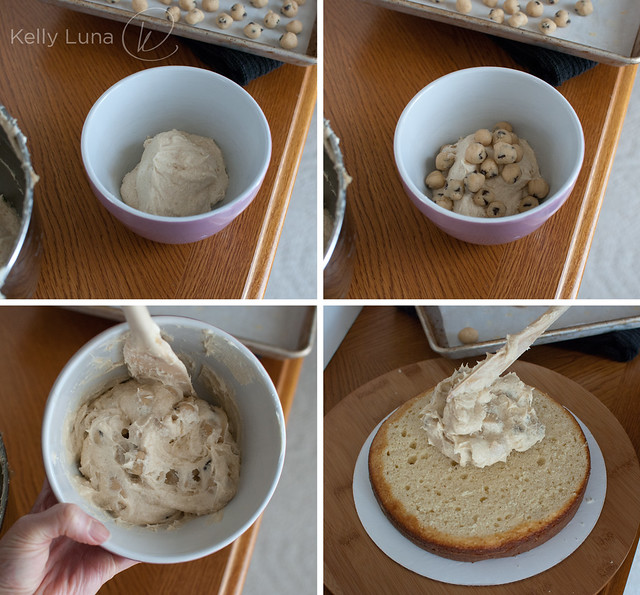
Added more frosting, filled the gaps with more dough balls then added the top layer...
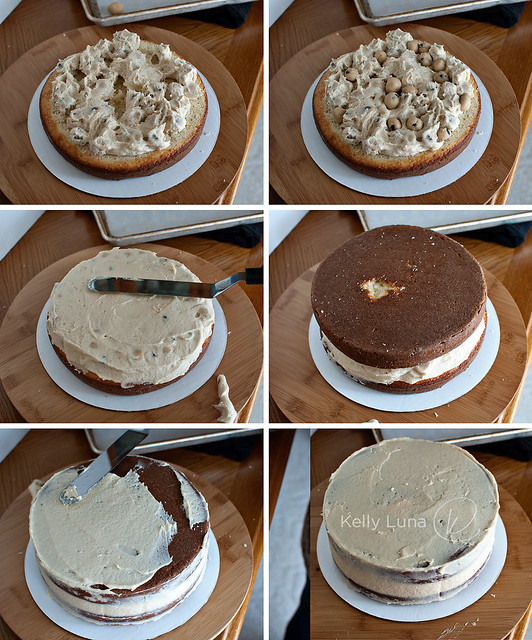
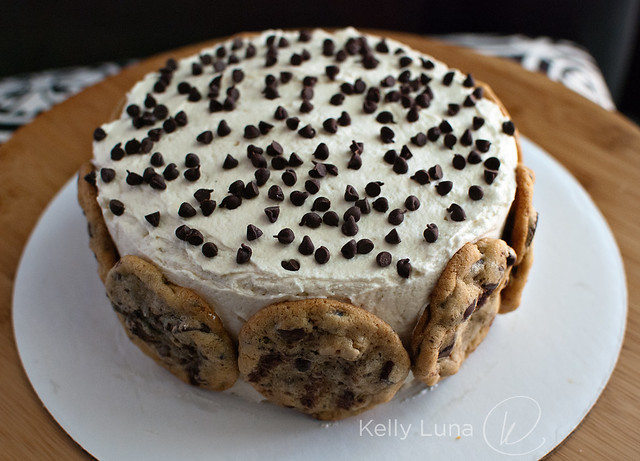
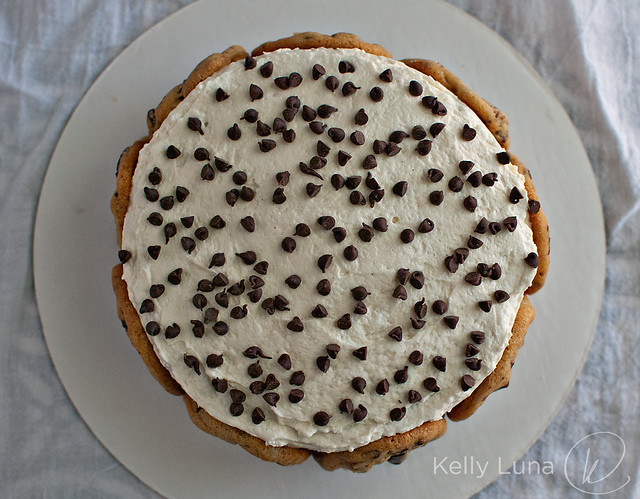
Then crumb coated the entire cake.
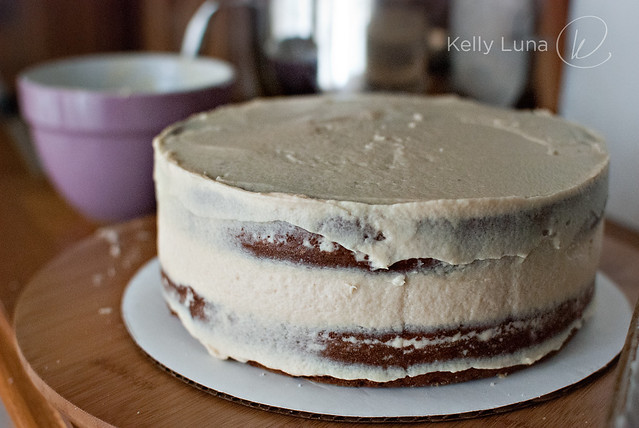
Popped in in the fridge to set up, then finished frosting it. I added
medium size cookies around the base and small cookies along the top
edge, sprinkled mini chips on the top and (literally) threw mini chips
on the side. (It was a hoot. I was flinging chips all over the place.)
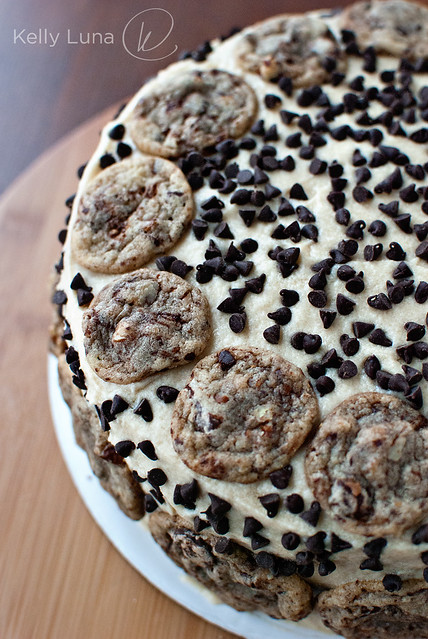
Some would stick, some wouldn't, but I just kept flinging until it was
coated to my liking. For the 6" cakes I made for my co-worker's
birthday, I just used medium size cookies, which took up the entire
sides, then sprinkled chips on the top.
For the cupcakes, I just cut out a cone of cake, stuffed the hole with the no bake cookie "dough"...
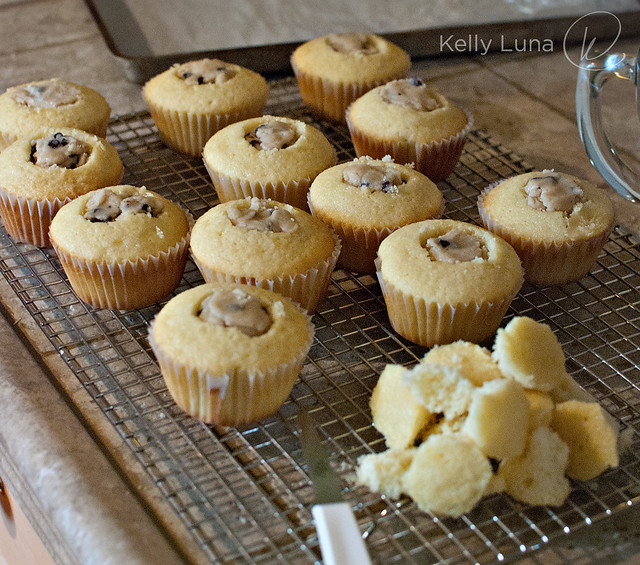
(I totally ate almost all of that pile of cake bits. I'm not going to lie.)
...and piped frosting over the top using the Wilton 1M tip, my go-to
tip. (It's only about $2 - you totally need to have one, if you don't
already. They make your cupcakes look super purdy.)
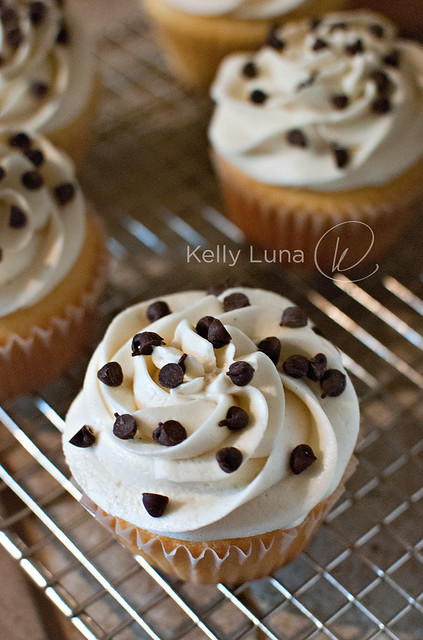
Topped with mini chips, the cupcakes are ready to go.
So what do you think? Pretty awesome, right? If you have a few hours to
wile away on a weekend, give this cake a shot. Someone will probably
tell you it's the best cake they've ever had. For reals.


")

. Photo by CIndytc")